This article provides instructions to install your Lorex 2K Wire-Free Camera (U424AA).
![]() The camera battery comes partially charged (due to safety regulations). Please, fully charge the battery before use and setup to take full advantage of the Wire-Free camera.
The camera battery comes partially charged (due to safety regulations). Please, fully charge the battery before use and setup to take full advantage of the Wire-Free camera.
What is included in the box?

Setup 2K Wire-Free Camera
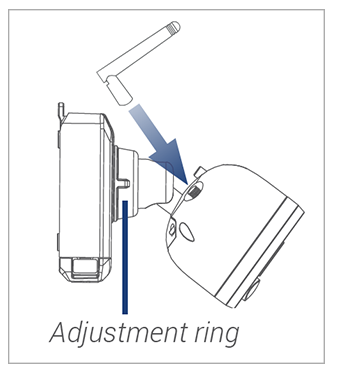
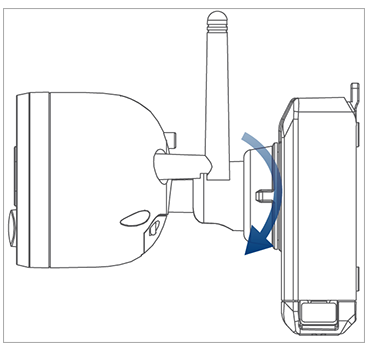
Turn the adjustment ring counterclockwise to loosen and angle the camera.
Screw in the antenna.
Insert the battery pack into the bottom of the camera.
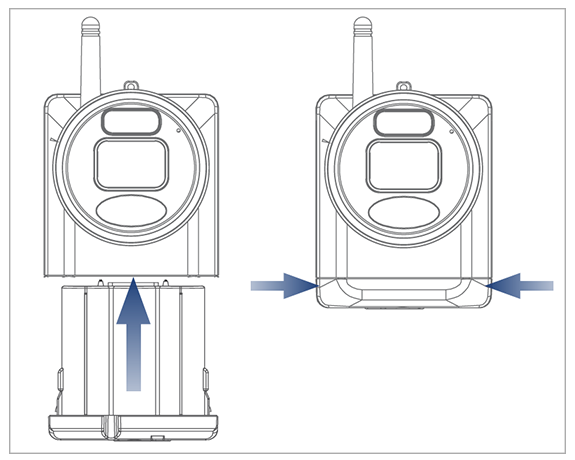
 You will hear a ‘beep’ when the power pack is properly inserted. If you do not hear this alert, remove the power pack by pushing in on the battery release tabs, then re-insert.
Install 2K Wire-Free Camera
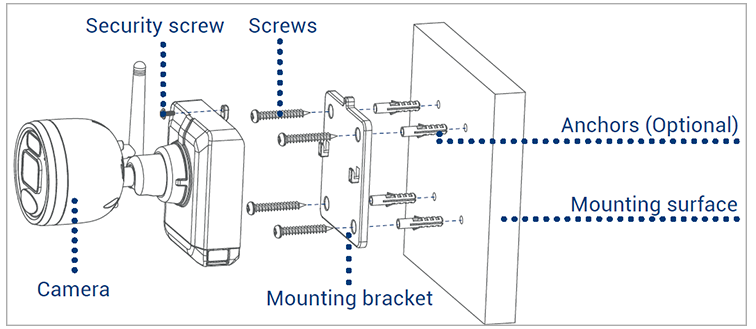
Set the mounting bracket in the desired mounting position.
Mark holes through the mounting bracket.
Using the included drill bit, drill holes where marked.
Using the included screwdriver, secure the bracket with the provided mounting screws.
Optional: If you are mounting the camera into drywall, use the provided drywall anchors.Align the camera’s mounting plate slots to the tabs in the mounting bracket. Push in and slide down to secure in place.
Insert the security screw through the fasteners on the top of the camera and mounting bracket, then tighten with the screwdriver.
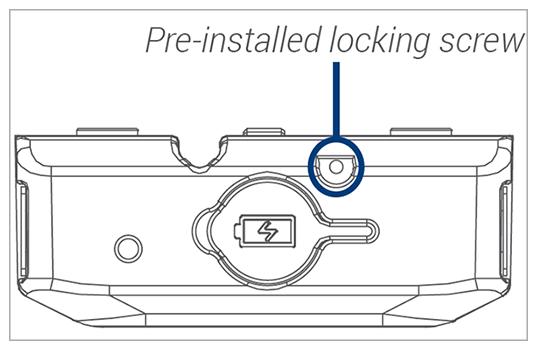
Tighten the pre-installed locking screw using the screwdriver.
Note: To remove the power pack in the future, loosen the locking screw.Adjust the camera to the desired position. Tighten the adjustment ring clockwise.
Connect 2K Wire-Free Camera to the Lorex Cirrus app
Download the Lorex Cirrus app by scanning the QR code.
You can also visit Google Play or Apple Store to download Lorex Cirrus app.
Open the Lorex Cirrus app.
From the Home screen, select your recorder from the list of devices.

Tap any free channel marked with
 icon to pair a camera to the channel.
Tap Pair. A thirty second timer will appear.
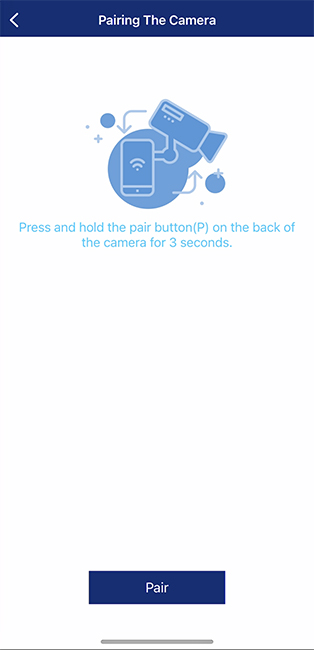
Press and hold the pairing button on the back of the camera until the red LED lights stop flashing, then release the pairing button. A ‘Pairing success!’ message will appear on screen. If you do not see this message, repeat steps 3-6.
Was this article helpful?
That’s Great!
Thank you for your feedback
Sorry! We couldn't be helpful
Thank you for your feedback
Feedback sent
We appreciate your effort and will try to fix the article