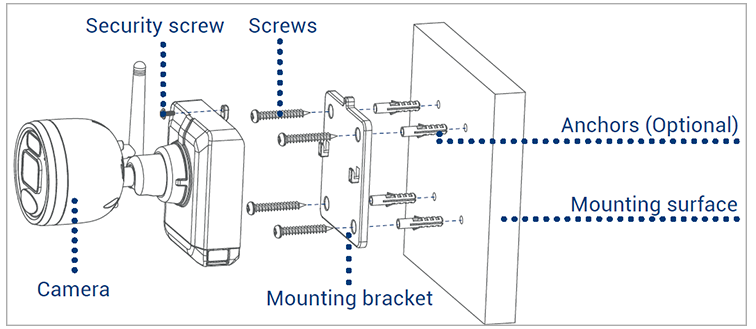
Set the mounting bracket in the desired mounting position.
Mark holes through the mounting bracket.
Using the included drill bit, drill holes where marked.
Using the included screwdriver, secure the bracket with the provided mounting screws. Optional: If you are mounting the camera into drywall, use the provided drywall anchors.
Align the camera’s mounting plate slots to the tabs in the mounting bracket. Push in and slide down to secure in place.
Insert the security screw through the fasteners on the top of the camera and mounting bracket, then tighten with the screwdriver.
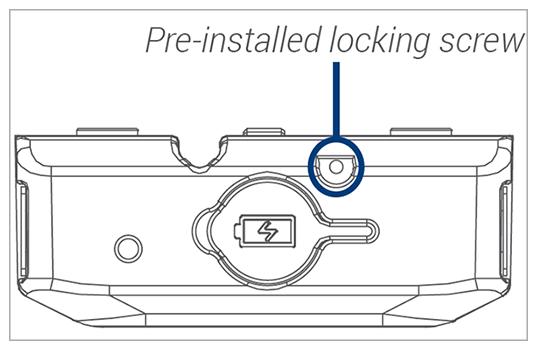
Tighten the pre-installed locking screw using the screwdriver. Note: To remove the power pack in the future, loosen the locking screw.
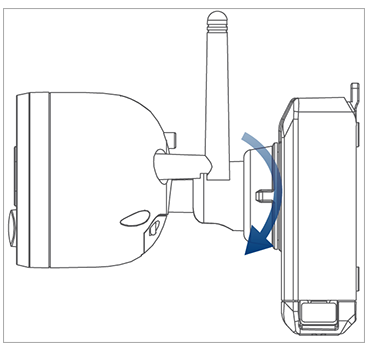
Adjust the camera to the desired position. Tighten the adjustment ring clockwise.
Was this article helpful?
That’s Great!
Thank you for your feedback
Sorry! We couldn't be helpful
Thank you for your feedback
Feedback sent
We appreciate your effort and will try to fix the article