This article provides instructions for installing your 4K Dual-Lens IP Wired Security Camera E871AB.
TABLE OF CONTENTS
What's Included
- 4K Dual-Lens IP Wired Camera
- Mounting Template
- Anchors & Screws (x4)
- Ethernet Extension Cable
Camera Placement Tips
- Install the camera in a location that is difficult for thieves and vandals to reach.
- Secure cabling so that it is not exposed or easily cut.
- Point the camera where there is the least amount of obstructions (i.e. tree branches).
- Take into consideration what you want to monitor and where is the best coverage area.
- Place your camera close to the area of interest.
- The best position is 10 ft (3 m) above ground, angled 15° down.
Installation
Camera Mounting
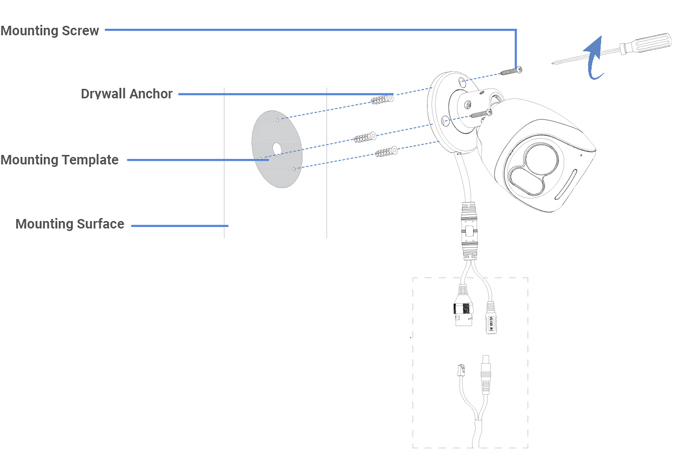
- Use the mounting template to drill holes for screws, then insert the drywall anchors. Drill a hole for the camera's cable if you plan to run it through the mounting surface.
- Connect a PoE cable to the camera.
Note: The power cable is optional and only required if you are not using Power over Ethernet (PoE). - Twist on the RJ45 waterproof seal.
- Route the PoE cable through the wall or along the wall using the bracket's notch, so the camera sits flush against the wall.
- Connect the PoE cable to the NVR's PoE port.
- Use the screws to mount the camera base to the surface.
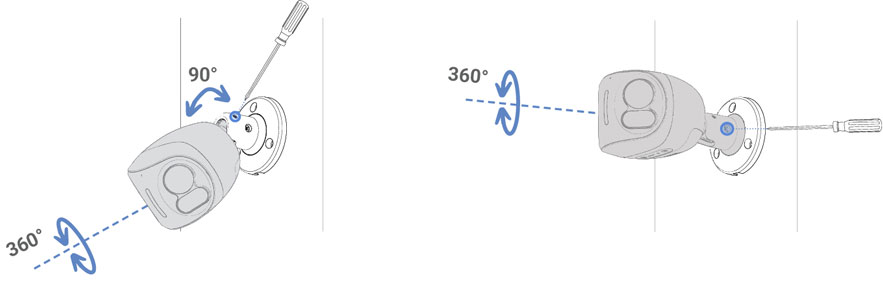
- Loosen the adjustment screws and position your camera as needed, then tighten to secure it in place.
- Remove the vinyl film from the camera lens once your installation is complete.
Camera Connection

Connect your camera directly to your recorder using the camera's Ethernet extension cable.
Weather-Resistant Cap

Twist the Ethernet extension cable's pre-attached weather-resistant cap securely onto your camera's Ethernet connector. If exposed to regular precipitation, seal the cap with silicone and electrical tape.
Was this article helpful?
That’s Great!
Thank you for your feedback
Sorry! We couldn't be helpful
Thank you for your feedback
Feedback sent
We appreciate your effort and will try to fix the article