This article provides instructions on configuring deterrence features of *4K Smart Deterrence IP Camera with Smart Motion Detection Plus * (E893DD Series, E893AB Series) from the NVR.
Automatic deterrence settings
Lorex Active Deterrence cameras feature bright, customizable warning lights and a remote-triggered siren. You can set preferences for automatic warning light triggering on compatible Lorex deterrence cameras.
To configure deterrence settings
From the Live View display, right-click to open the Quick Menu, then click Main Menu.
Enter the system user name (default: admin) and password.
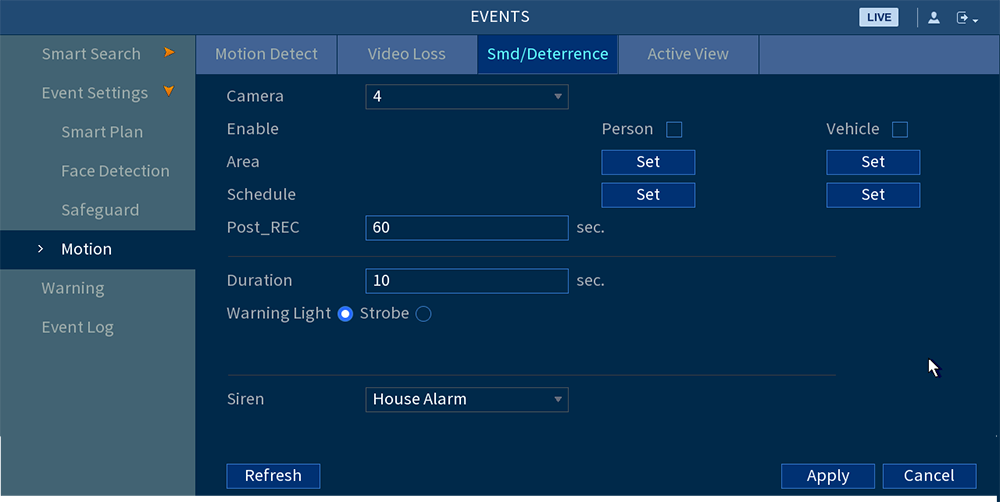
Click EVENTS > Event Settings > Motion > Smd/Deterrence.
Under Camera, select the channel connected to the smart deterrence camera.
Check Person and/or Vehicle to enable each type of smart detection.
Click Set > Area under each detection type you have enabled to set the active areas.
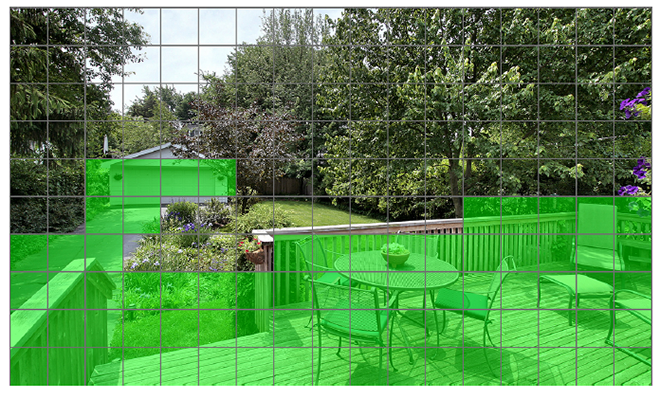
- The camera image appears with a grid overlay. The green area is the active area for deterrence.
- Click or click-and-drag to add / remove boxes from the active area.
- In the example image above, only motion around the garage or on the porch will trigger the warning light.
- Right-click when finished.
Click Set > Schedule to set the weekly schedule.
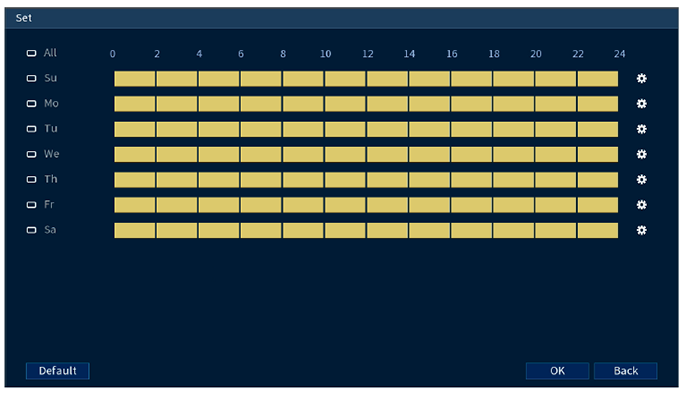
- Click or click-and-drag along each of the yellow timelines to quickly add or remove time from each day's schedule in 15minute segments.
- Click
 beside 2 or more days to link schedules (
 ). This allows you to quickly
change multiple schedules at once.
). This allows you to quickly
change multiple schedules at once. - To make fine adjustments to a schedule, click
 . This will allow you to set exact start
and end times for a schedule.
. This will allow you to set exact start
and end times for a schedule. - Click OK when finished.
Configure preferences for the warning light:
- Duration: Choose how long the warning light will stay on when motion is detected.
- Select Warning Light for a solid white light, or Strobe for a flashing light. If you select Strobe, set how quickly the light will flash under Strobe Frequency.
- Click Apply.
Manually Activate Deterrence Features
The system has multiple options for activating deterrence features.
To activate deterrence features on a single camera
Hover the mouse pointer near the top of the camera image in Live View to reveal the Camera Toolbar. Click
 to activate the warning light, or
  to activate the siren.
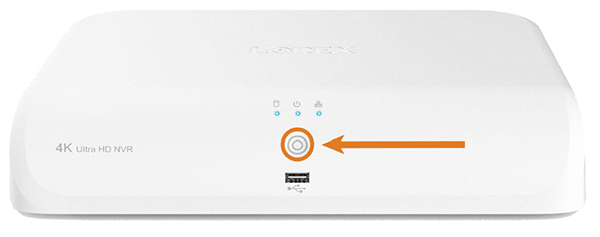
To activate deterrence features on all connected cameras
Push and hold the front panel panic button on the recorder for 3 seconds.
Was this article helpful?
That’s Great!
Thank you for your feedback
Sorry! We couldn't be helpful
Thank you for your feedback
Feedback sent
We appreciate your effort and will try to fix the article