Your recorder comes with a pre-installed 3.5 SATA hard drive. You can replace the hard drive with one up to a maximum size of 8TB or 10TB (varies per model).
TABLE OF CONTENTS
Section 1 - Replacing hard drive on newer models
Removing the hard drive
Step 1. Power off the system, and unplug all cabling from the system.
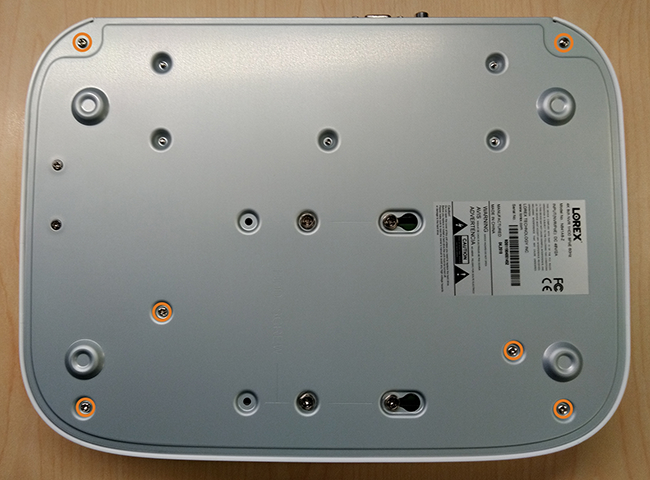
Step 2. Turn the recorder over, then remove the 6 bottom panel screws as shown in the image below.
Step 3. Turn the recorder over carefully, then lift the top panel so you can access the hard drive.
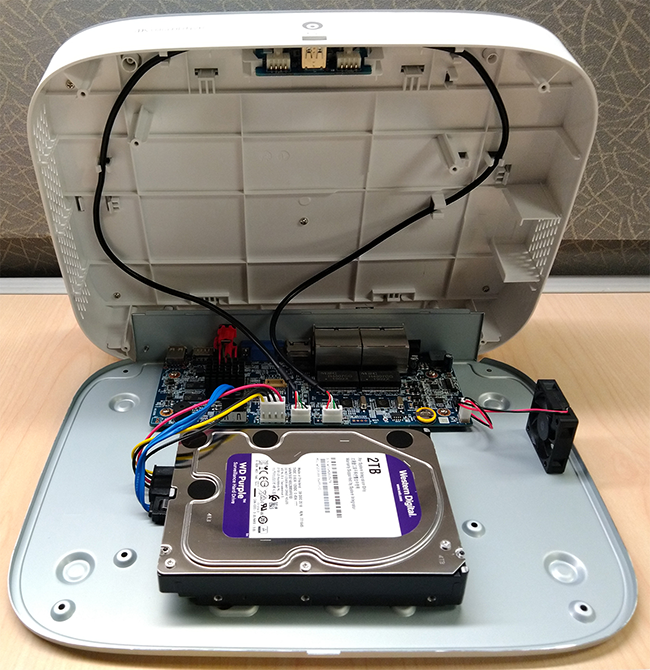
Step 4. Now carefully remove the power and SATA cables from the hard drive as shown below.

Step 5. Carefully pick up the hard drive to lift the bottom panel, being mindful of the sharp edges of the bottom panel. Remove the hard drive screws (4×) from the bottom panel. Hold onto the hard drive so it remains in place when all screws have been removed.
Step 6. If you are not immediately going to install a new hard drive, replace the top panel and the 6 bottom panel screws.
Installing a new hard drive
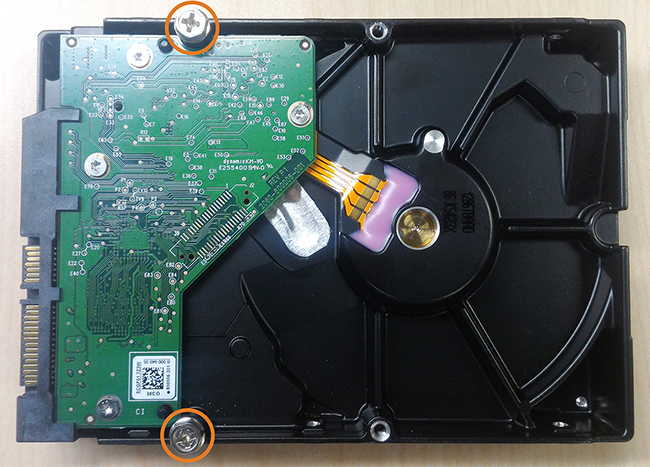
Step 1. Insert the 2 hard drive screws closest to the SATA and power ports on the hard drive and tighten them half way. See image below.
Step 2. Power off the system, and unplug all cabling from the system.
Step 3. Turn the recorder over, then remove the 6 bottom panel screws as indicated in the image below.
Step 4. Turn the recorder over carefully, then remove the top panel.
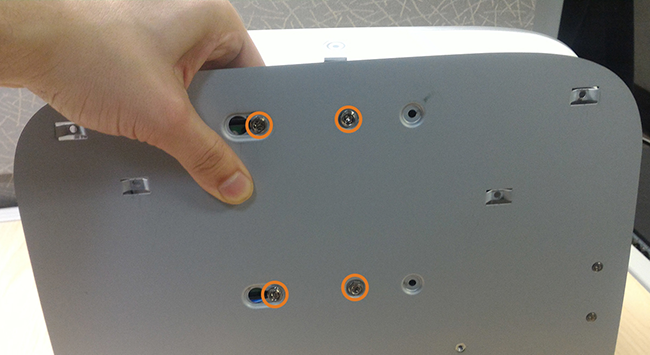
Step 5. Line the 2 half-inserted hard drive screws with the 2 holes shown in the image below.
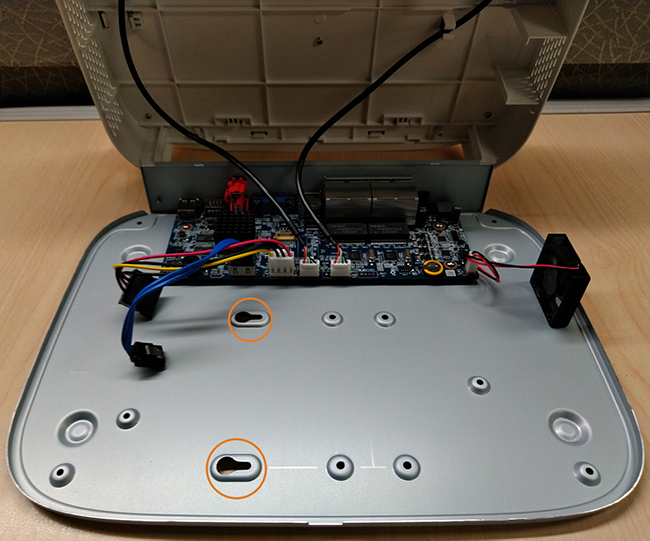
Once you have inserted the hard drive screws to their respective slots, it should look like this.
Step 6. Carefully pick up the bottom panel with the hard drive, being mindful of the sharp edges of the bottom panel. Slide the 2 pre-inserted screws into the locked position, then tighten the screws. Insert and tighten the 2 remaining hard drive screws.
Step 7. Connect the power and SATA cables to the hard drive.

Step 8. Replace the top panel and the 6 bottom panel screws.
Section 2 - Replacing hard drive on older models
Removing the hard drive
Step 1. Power off the system, and unplug all cabling from the system.
Step 2. Remove the back panel screws (4×). Remove the cover by sliding it backwards.

Step 3. Turn the recorder over carefully. Remove the 2 hard drive screws closest to the edge of the recorder. Loosen the remaining 2 hard drive screws, but do not remove them.

Step 4. Remove the power and SATA cables from the hard drive.
Step 5. Slide the hard drive out of the recorder.
Step 6. If you are not immediately going to install a new hard drive, replace the top panel and the 4 back panel screws.
Installing the hard drive
Step 1. Insert the 2 hard drive screws closest to the SATA and power ports on the hard drive and tighten them half way.
Step 2. Power off the system, and unplug all cabling from the system.
Step 3. Remove the back panel screws (4×). Remove the cover by sliding it backwards.
Step 4. Insert the hard drive so the 2 pre-inserted screws line up with the holes in the bottom panel as shown below. Slide the hard drive in place. Insert the remaining 2 hard drive screws, and tighten all 4 screws tightly.
Step 5. Connect the power and SATA cables to the hard drive.
Step 6. Replace the top panel and the 4 back panel screws.
NOTE: If your recorder is not mentioned in this list, please call Tech Support at 1-888-425-6739.
Was this article helpful?
That’s Great!
Thank you for your feedback
Sorry! We couldn't be helpful
Thank you for your feedback
Feedback sent
We appreciate your effort and will try to fix the article