This article provides instructions for installing your ACSOL3 Series Solar Panel for Battery-Operated Cameras.
Installation Tips:
- Choose a location for the solar panel with plenty of direct sunlight exposure. Do not install in a covered or shaded area. Performance is dependent on temperature and light exposure.
- Make sure to fully charge the camera battery pack. Refer to the product documentation for charging instructions.
Optional: To install the camera without any gaps between the device and the wall, drill holes to run the Solar Panel power cord through the wall.
Installing the Solar Panel:
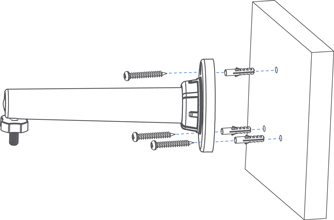
- Set the bracket to the desired mounting position.
- Mark holes through the Bracket.
- Using the included drill bit, drill holes where marked.
- Using a screwdriver, secure the Bracket with the provided screws.
Optional: If you are mounting the Solar Panel into drywall, use the provided drywall anchors.
- To adjust the Bracket, loosen the Bracket adjustment ring by turning it counterclockwise.
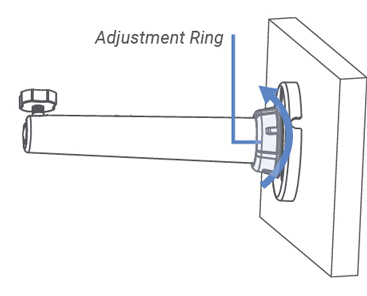
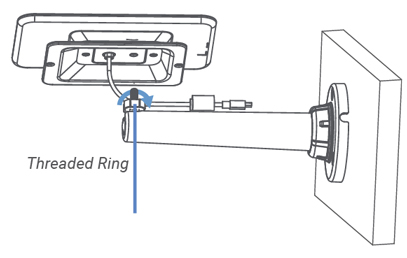
- Turn the Bracket's Threaded Ring counterclockwise, to lower the Ring.
- Twist the solar panel clockwise onto the Bracket.
- Adjust the angle of the solar panel to receive direct sunlight, then tighten the Adjustment Ring.
- Connect the Solar Panel cord to the desired adapter.
Connecting the Solar Panel directly to the camera
- Run the Solar Panel cord to the camera.
- Pull up the power port cover on the camera, and then connect the Solar Panel cord to the camera.

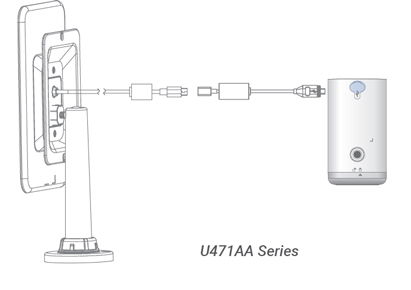
Connecting to the camera using an adapter
- Connect the Micro USB Adapter to the Solar Panel cord.
- Run the Solar Panel cord to the camera.
- Pull up the power port cover on the camera.
- Connect the adapter to the camera power port.
Was this article helpful?
That’s Great!
Thank you for your feedback
Sorry! We couldn't be helpful
Thank you for your feedback
Feedback sent
We appreciate your effort and will try to fix the article